It is understood that sintered stone is made of natural stone and inorganic clay through a special process, using vacuum extrusion molding and automatic closed computer temperature control roller kiln firing 1300 degrees, is currently the thinnest (only 3mm), the existing largest specification (3600 × 1200mm). Scope of application:
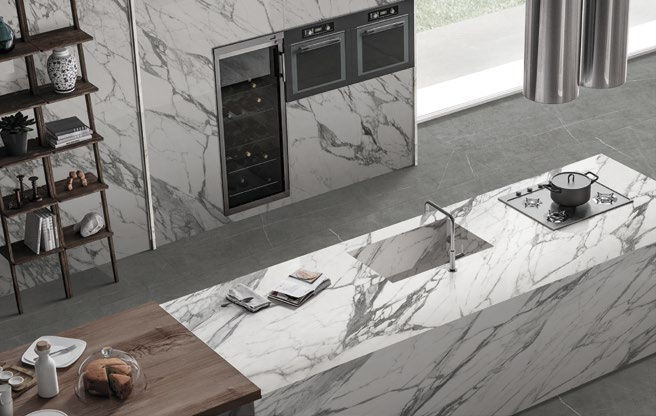
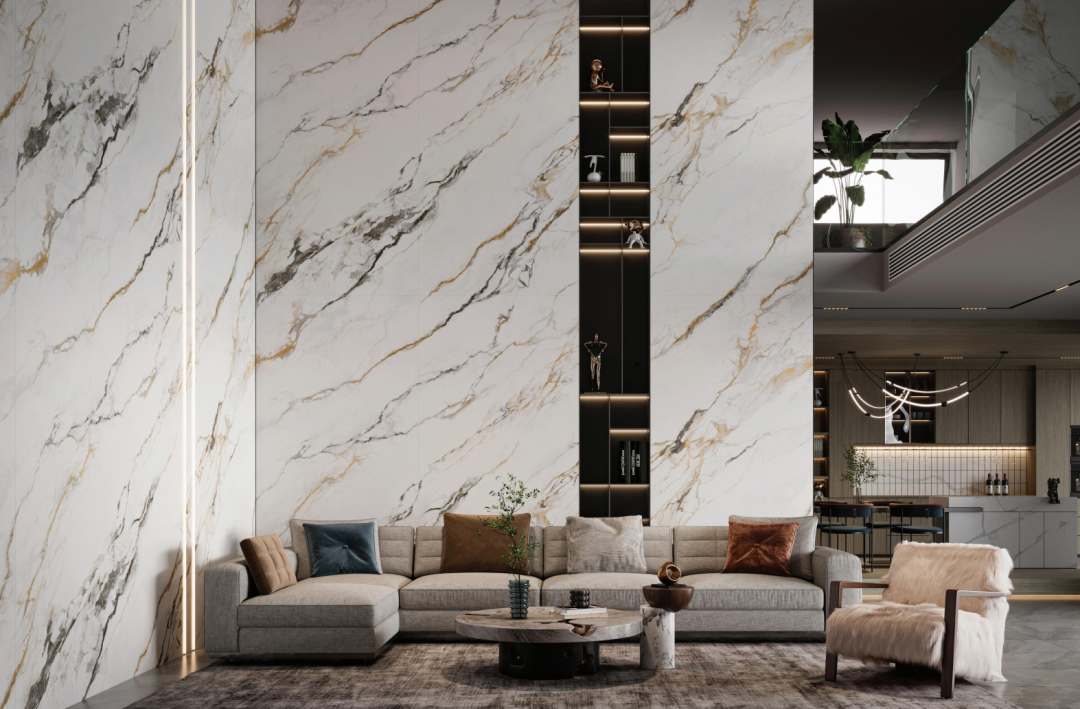
Sintered stone has a wide range of applications and creates a strong overall decorative effect. Because of its realistic marble texture, it has been used in both large spaces and home decor, demonstrating a magnificent visual effect and enhancing the level of space. It can also be used as a decorative material for countertops in kitchens and bathrooms.
02. Construction process of sintered stone bonding method The mainstream construction method for sintered stone slabs in the current market is the adhesive technology provided by manufacturers. Using appropriate equipment and tools can effectively solve problems such as the difficulty of handling large-format sintered stone slabs and unstable installation. In addition, the method of drywall construction with rock wool composite boards is also very economical and stable. The specific method used depends on the actual construction situation.
Base treatment → snap grid → adhesive preparation → adhesive application → coating the back of large sintered stone slabs → slab paving → compacting leveling → using a level adjuster to help level → surface cleaning and protection → joint treatment NO.1Preparation
Before paving, we need to prepare tools for paving large-format and large-sized slabs, such as:Industrial grade suction cups for tiles, mobile fixing racks, specially made tile protection mobile brackets, lightweight plastic hammers, gauges, steel mortar knives, spatulas, tile levelers, high strength tile adhesives, sponge joint scrapers, cleaning sponges, etc. NO.2Pre-paving inspection Checking the construction map, flatness test, verticality test, plumbing wiring installation test, and waterproofing are the prerequisites for ensuring the best tiling effect and creating a high-quality living space. After testing and confirming that there is no problem, it is necessary to use special tools (suction cups) to The large surface tiles are transported to the designated location. During the transportation process, personnel and tools need to be reasonably arranged to ensure that the tiles are not damaged. NO.3Base surface treatment
Lay a solid foundation: Remove floating ash, oil and other stains from the base to prevent affecting the adhesion of tile adhesive. The interior of the base must remain level. Uneven or rough areas can be leveled with cement mortar. At the same time, the construction base should be sufficiently moistened to prevent hollow drums. NO.4 Mix the tile adhesive
●1. Add tap water to the mixing bucket, then add the adhesive in batches. The mixing ratio is generally 1 part water to 4 parts dry powder (please refer to the product instructions for specifics). Mix evenly into a paste with a low-speed electric mixer. ●2. Rest for 5-10 minutes after hydration, then mix for another 3 minutes before use. (The hydrated adhesive cannot be added with water or dry adhesive powder and mixed again, otherwise it will affect the bonding effect). ●3. After stirring the adhesive evenly, take it up with a putty knife and invert it. The adhesive should fall from the putty knife in about 5 seconds, indicating the optimal consistency. Note: The adhesive should rest for 5-10 minutes after preparation. The working time of the adhesive is 2 hours at normal temperature. (Working time refers to the time from preparation to use). NO.5Apply tile glue
Apply an even layer of tile adhesive to the ground, forming a semi-dry layer. Then use tile adhesive again to level uneven areas on the surface with a thickness of about 0.5cm. Under appropriate conditions, the tile adhesive can be evenly applied to the back of the stone slab, requiring the tile adhesive to be applied fully.
When applying the back of the stone slab, use a serrated putty knife to evenly apply the tile adhesive into serrated strips. Note that when applying the adhesive, the base and the large slab should be scraped in the same direction to facilitate air removal and prevent the tile adhesive from bubbling and causing cracking and falling off. NO.6 Moving and installation
Use a three-hole glass suction tool to lift the large slab flat and move it to the construction position, place it on the tile adhesive-coated base, and at least 2 workers are required for transportation; use a mobile rack for larger areas. The bonding sequence of large slabs is "from inside to outside". It is necessary to ensure the fullness of the adhesive to avoid bubbling. According to the design requirements, appropriate spacers should be used when bonding the stone slabs to ensure that the size of the joints meets the design requirements and the width of the joints is consistent. NO.7Leveling and compacting Lay the stone slabs flat on the base. Use a rubber mallet or plastic board to tamp the stone slabs firmly and level them to allow full mortar between the stone slabs and the base, and release air bubbles to avoid bubbling. When tapping the surface of the completed large slab tiles, be sure to control the force. The tapping direction can follow from the middle of the stone slab to the surroundings. While leveling the slab with a rubber mallet or plastic board, measure with a gauge to ensure that the stone slabs are laid horizontally.
Insert leveler bases around the edges of the positioned large slabs at intervals of about 60 cm. After inspecting the levelness, insert leveling wedges and tighten the levelers to adjust the surface levelness of adjacent large slabs, and adjust the gaps between the large slabs to about 2mm for subsequent joint treatment. NO.8 Hollowness inspection
One hour after paving, you can tap the slab surface with a rubber mallet to check for hollowness. Tiles that make a "hollow" sound must be repaved. 24 hours after the tiling is completed, the joint construction can be carried out. NO.9Slab surface cleaning Clean the remaining adhesive, dust and sand in time. Joint treatment can be performed 24 hours after the stone slabs are paved. The joint filler can be used to seal the tile joints with a sponge joint scraper. After the joint filler hardens, clean up excess joint filler. Construction Tips 1. It is recommended to use professional tile adhesive instead of traditional [cement] when paving large slabs, because cement paving is easy to cause bubbling. 2. The thickness of tile adhesive paving should be 5-7 mm. Excessive tile adhesive can easily lead to falling off later. It is recommended to use an adhesive. 3. If the height exceeds 7.2 meters, dry hanging method is recommended. 4. It is recommended to use joint filler/tile filler, which can increase the overall aesthetics of the stone slab and prevent mildew. After completing these steps, the entire paving operation steps of the large slabs will be successfully completed!
Sintered Stone come in size specifications. For the same quality and brand, the bigger the size, the more expensive it is. Similarly, the thicker it is, the more expensive. Therefore, it is crucial to confirm the size of the slabs before starting work, and try to avoid wasting slabs as much as possible. Layout a diagram for dividing the slabs proportionally. This way, the cutting will not affect the visual effect of the backsplash wall.
Elevate your space with the beauty of natural stone vanities. Our 12mm thick engineered Sintered Stone slabs provide the elegance of marble with unparalleled durability.
Seen here in striking black and white, the slabs are resistant to scratches, stains and heat. Sleek profiles and precision cutouts give a refined, built-in look.
With custom edging available, we shape the stone to fit your unique style. Beveled, rounded, ogee and laminated edges add subtle details.
Bring dimension and texture


 XFC 2024 Sintering stone full case service provider
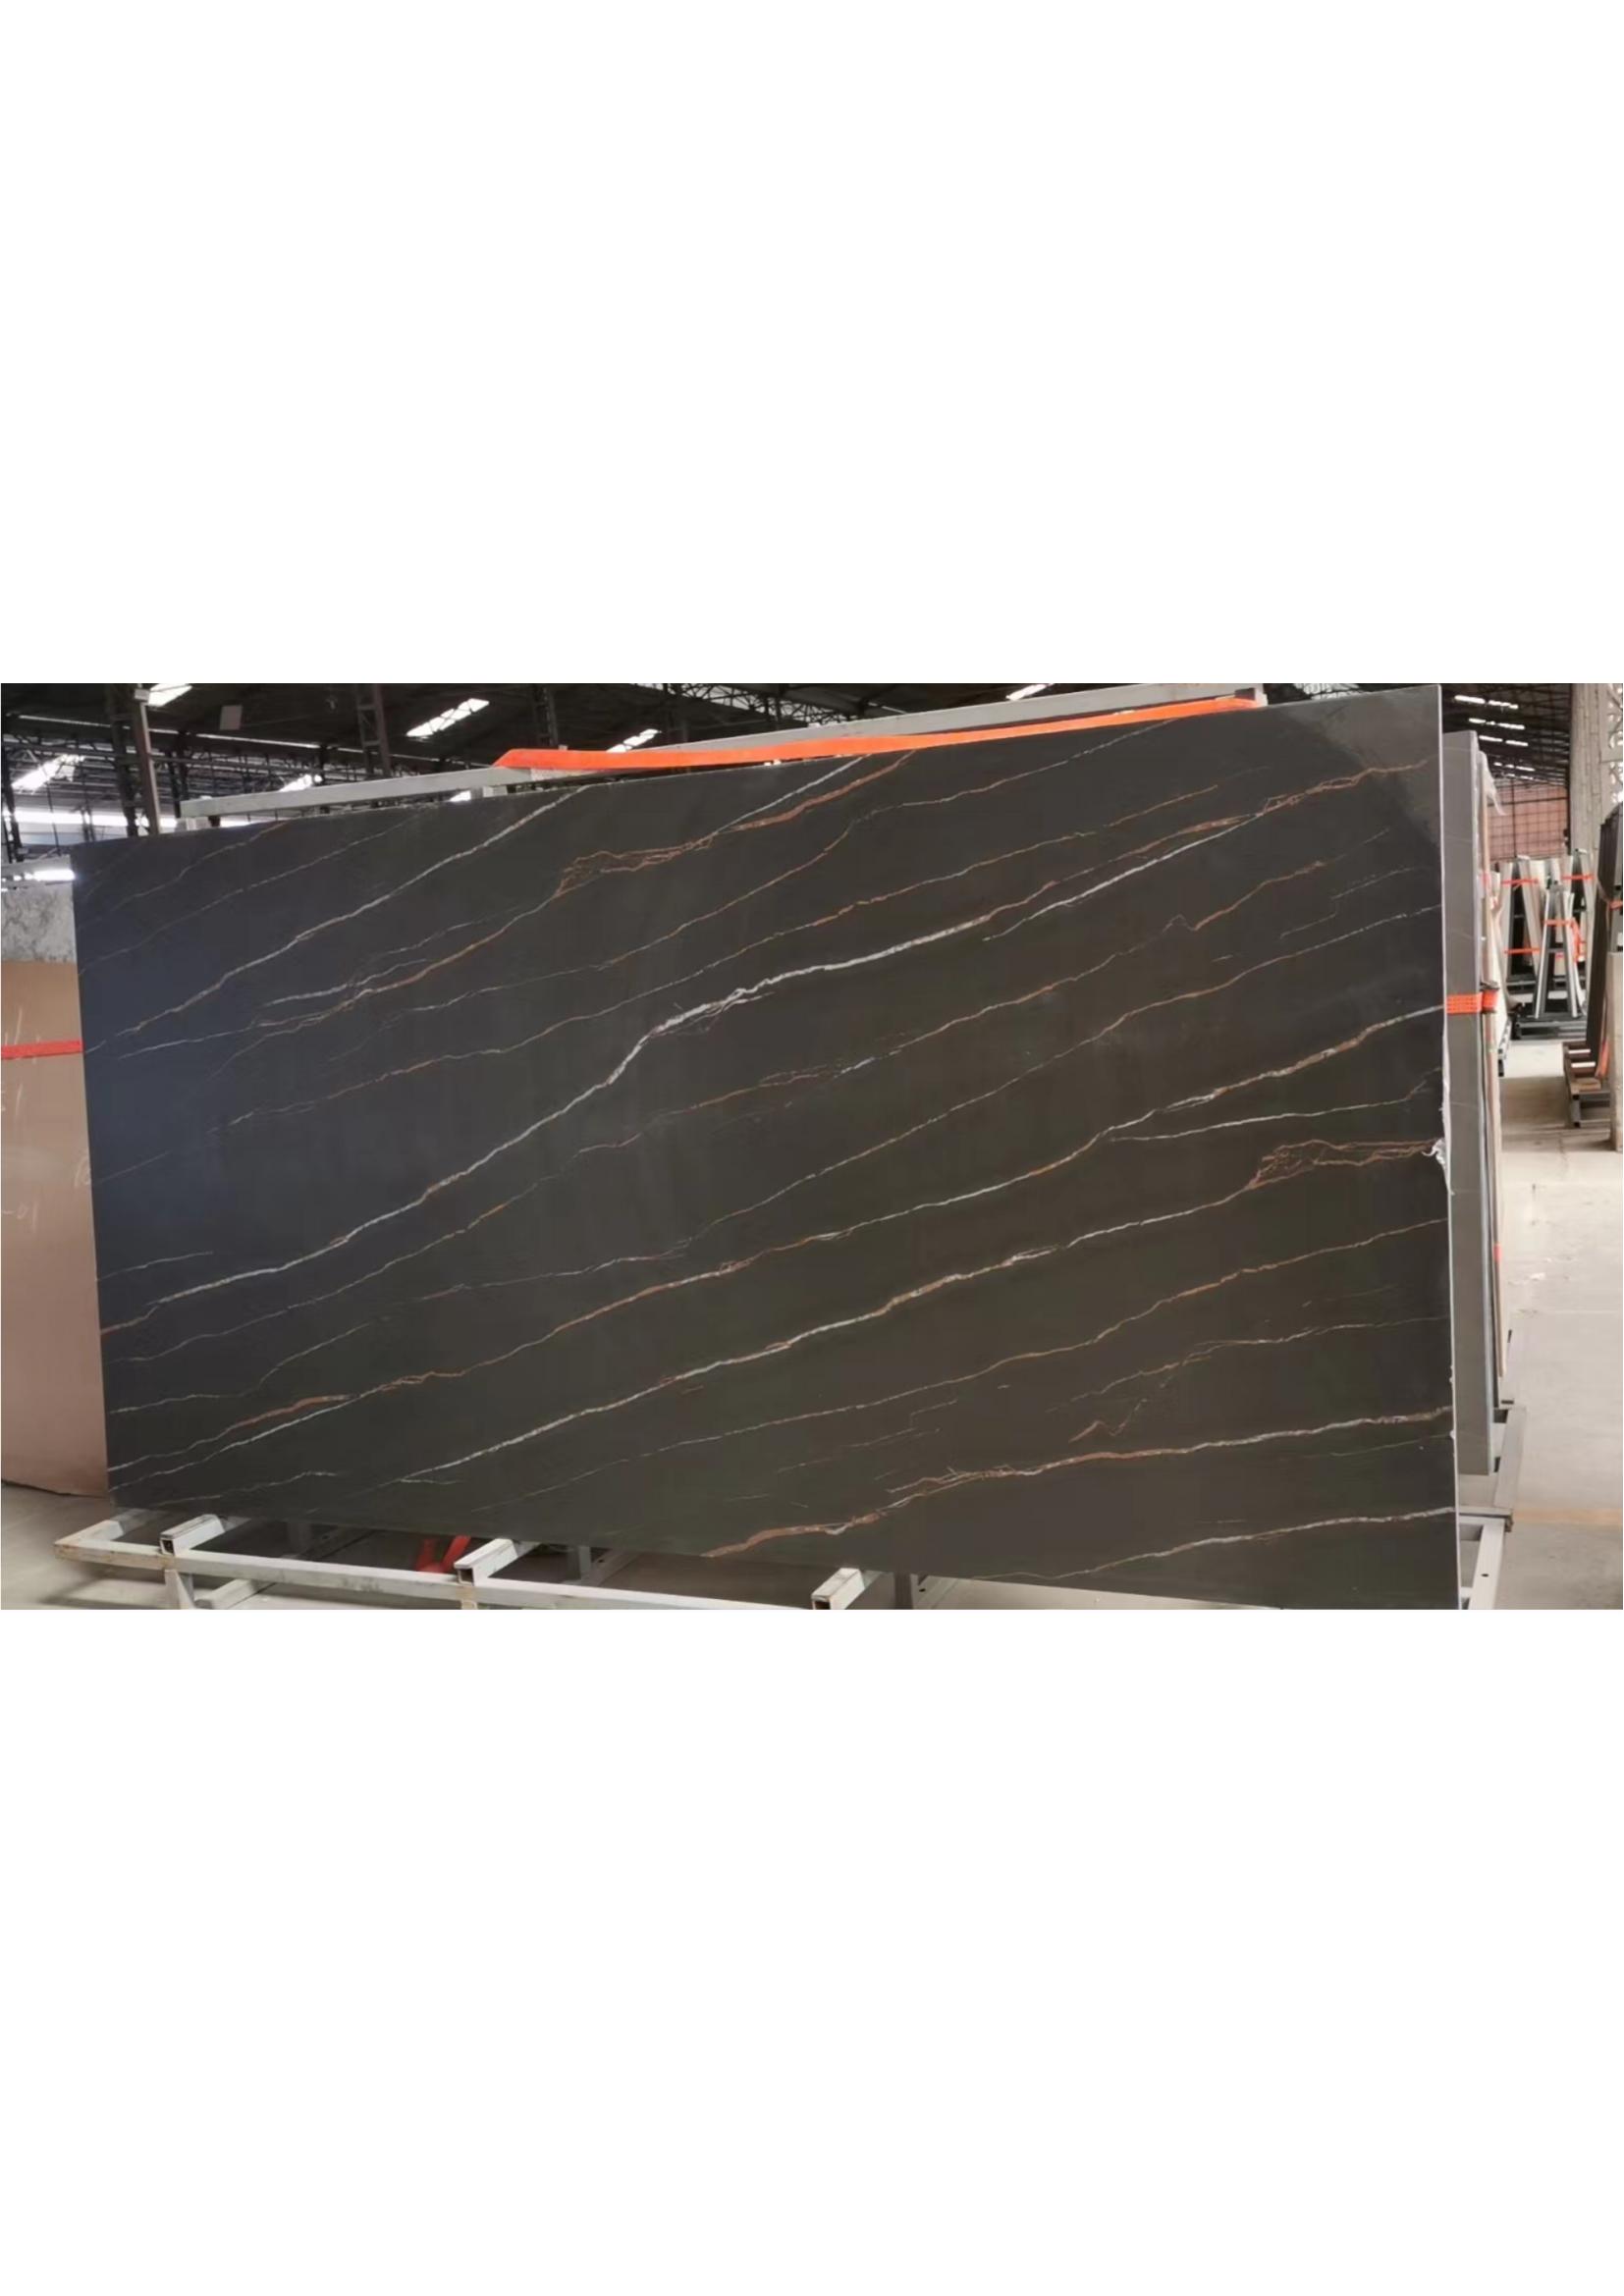 XFC-1600X3200X12mm Real shot
 Things You Need to Know Before Buying Sintered Stone
 Our 12mm thick engineered Sintered Stone slabs provide the elegance of marble with unparalleled dura